
HOW TO CLEAN YOUR K&N AIR FILTER
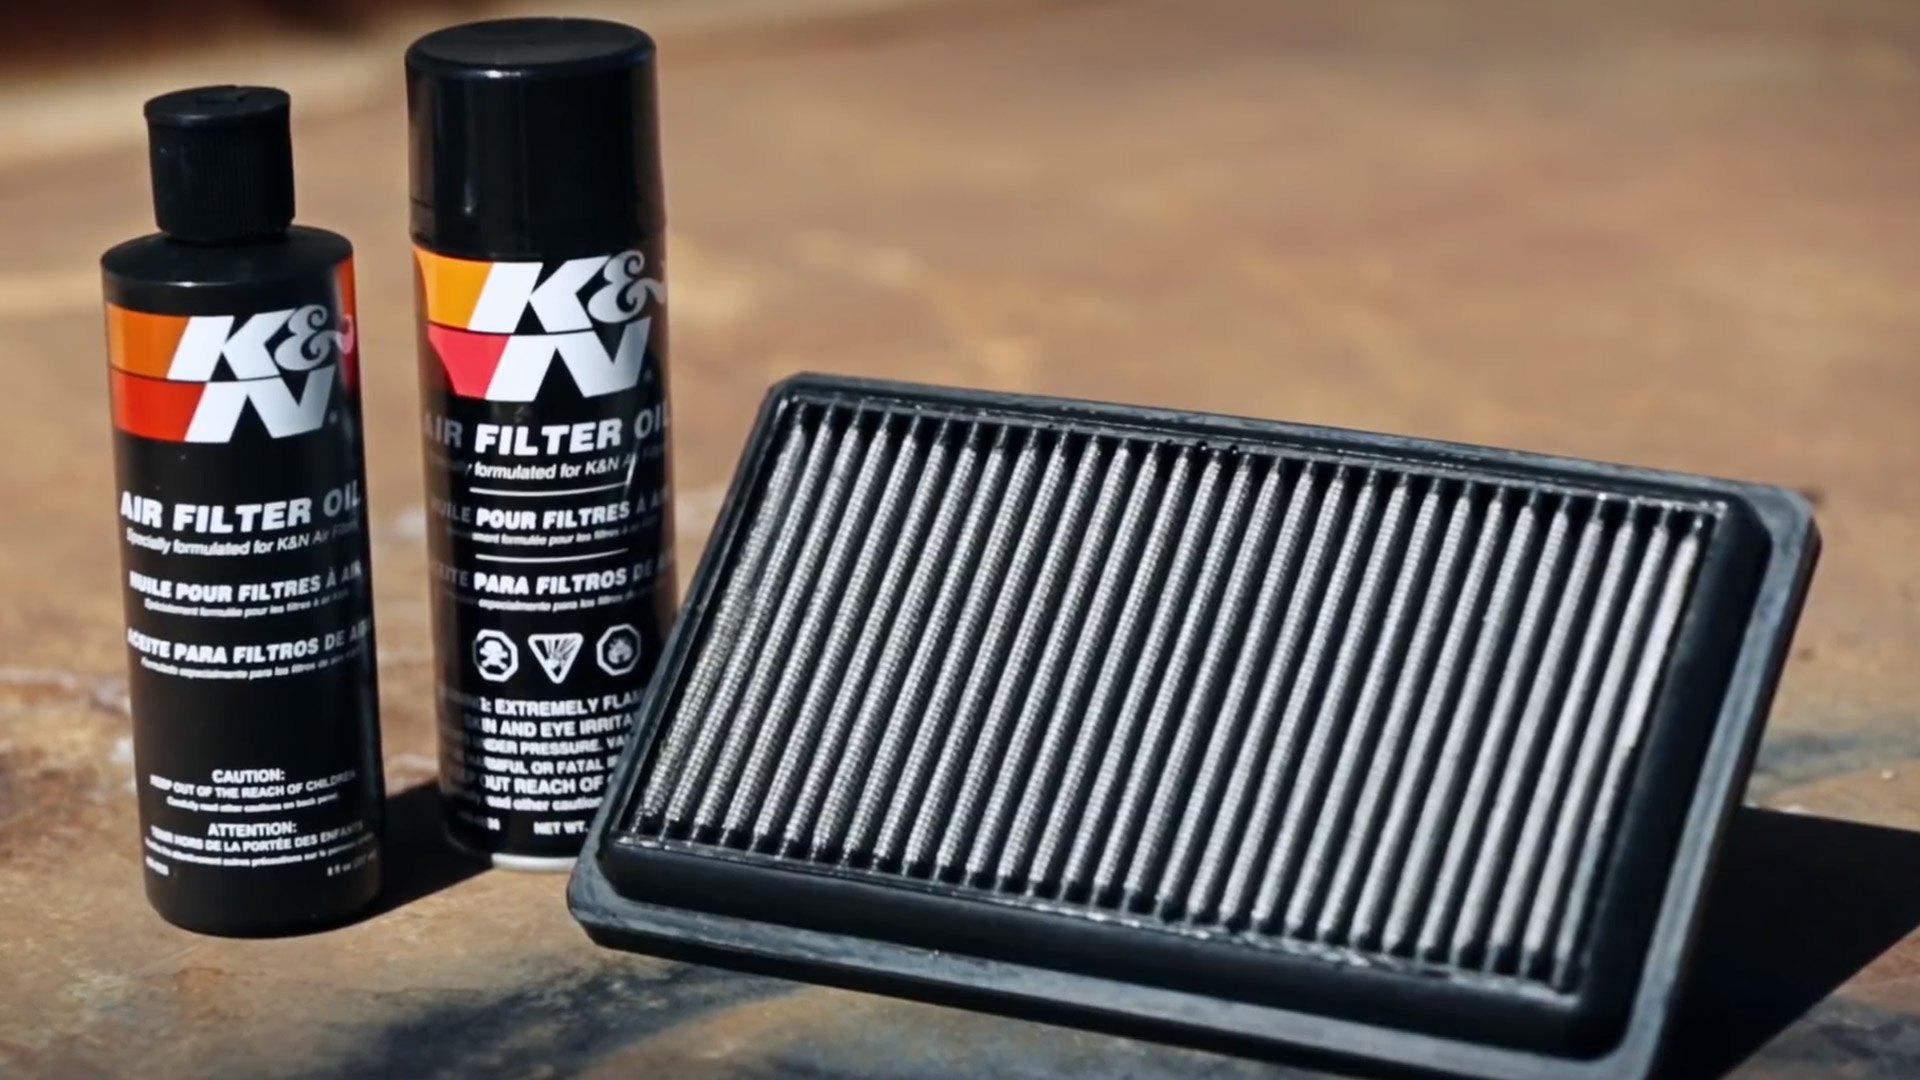
- K&N® OILED COTTON STOCK REPLACEMENT OR UNIVERSAL HIGH-FLOW AIR FILTER
-
- If you have not experienced a decrease in mileage or engine performance, chances are your filter is fine and does not yet need cleaning. To be more specific, the filter does not require cleaning if you can still see the wire screen on the entire air filter regardless of how dirty it may appear. When the screen is no longer visible some place on the filter, it is time to clean it. When used in normal paved road, street or highway conditions, K&N replacement air filters that fit in the factory air box should require cleaning every 50,000 miles and K&N large conical filters on an intake system should require cleaning every 100,000 miles.
- When used in dusty or off-road environments, K&N filters will require cleaning more often. Company recommend that you visually inspect your filter once every 25,000 miles to determine if the screen is still visible.
STEP 1 - APPLY K&N® POWER KLEEN®
- Liberally spray K&N Air Filter Cleaner onto both sides of filter and allow to soak for 10 minutes to loosen the dirt. Do not allow cleaner to dry on air filter.

STEP 2 - RINSE YOUR FILTER WITH LOW PRESSURE WATER
- Rinse off air filter with cool low-pressure water applied to the clean side out in order to flush the dirt out of the filter. Continue to rinse the filter until all traces of cleaner are gone. It may be necessary to repeat steps 1 and 2.

STEP 3 - ALLOW YOUR FILTER TO DRY NATURALLY
- After rinsing, gently shake off excess water and only allow filter to dry naturally. Do not oil until the filter is completely dry.
STEP 4 - APPLY K&N® FILTER OIL
A) Squeeze Oil (KN-99-5050)
- Apply K&N Air Filter Oil evenly along the crown of each pleat. Allow oil to wick for approximately 20 minutes. Touch up any light areas on either side of filter util there is a uniform fed color at all areas.

B) Aerosol Oil (KN-99-5000)
- Spray K&N Air Filter Oil evenly along the crown of each pleat holding nozzle about 3" away. Allow oil to wick for approximately 20 minutes. Touch up any light areas on either side of the filter until there is a uniform red color at all areas. The above process is the only approved procedure for maintaining your K&N Air Filter.

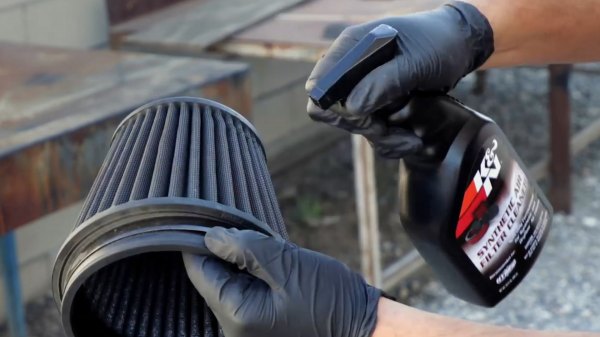
- K&N® DRYFLOW® AIR FILTER
-
STEP 1 - REMOVE FILTER
- Remove the air filter from the intake pipe, the OE airbox, or the custom assembly. Handling carefully, lightly tap off all loose dirt and debris.
STEP 2 - APPLY CLEANER
- Liberally spray K&N® Synthetic Air Filter Cleaner onto both sides of the filter, with the majority of it applied to the dirty side. Allow to soak in for 10 minutes. Do not allow it to dry on the air filter.
STEP 3 - RINSE FILTER
- Rinse off the filter element with cool or warm (not hot) water from the clean side out in order to flush the dirt out of the filter. It may be necessary to use your fingers on the hose, to apply light water pressure. Repeat steps 2 and 3, until the water flowing through the media is completely clear of any dirt and debris.
STEP 4 - DRY AND RE-INSTALL
- After rinsing, gently shake off excess water. Allow filter to dry naturally, or use compressed air to speed the drying cycle. The filter should be dry, or just slightly damp before re-installing. Re-install the filter onto the intake system or into the airbox once it is dry. Follow all original installation instructions.
- K&N® WASHABLE CABIN AIR FILTER
-

STEP 1 - REMOVE FILTER
- Remove the K&N cabin air filter from the cabin air filter housing and or cabin air filter tray. Handling with care, remove loose dirt and debris from the filter by tapping it with your hand or against a hard surface.
STEP 2 - APPLY CLEANER
- Spray a generous amount of K&N’s specially formulated cabin air filter cleaner onto both sides of the filter, with a majority of it applied to the dirty side. Allow the cleaner to soak in for 10 minutes. Do not allow the cleaner to dry on the cabin air filter.
STEP 3 - RINSE FILTER
- Rinse off the filter element with cool or warm (not hot) water from the clean side out in order to flush the dirt out of the filter. It may be necessary to use your fingers on the hose, to apply light water pressure. Repeat steps 2 and 3, until the water flowing through the media is completely clear of any dirt and debris.
STEP 4 - DRY
- After rinsing, gently shake off excess water. Allow filter to dry naturally for 20-30 minutes. The filter does not need to be completely dry and can be slightly damp before moving to the next step.
STEP 5 – REFRESH
- Apply K&N cabin air filter Refresher™ onto the cabin air filter element. Apply liberally, so that the entire area of the cabin air filter media is treated.
STEP 6 - RE-INSTALL
- Re-install the cabin air filter into the filter housing or tray. Follow original installation instructions that were provided with your K&N cabin air filter.