FAQ
- How to wire Remote Strobe Controller from OLB?
-
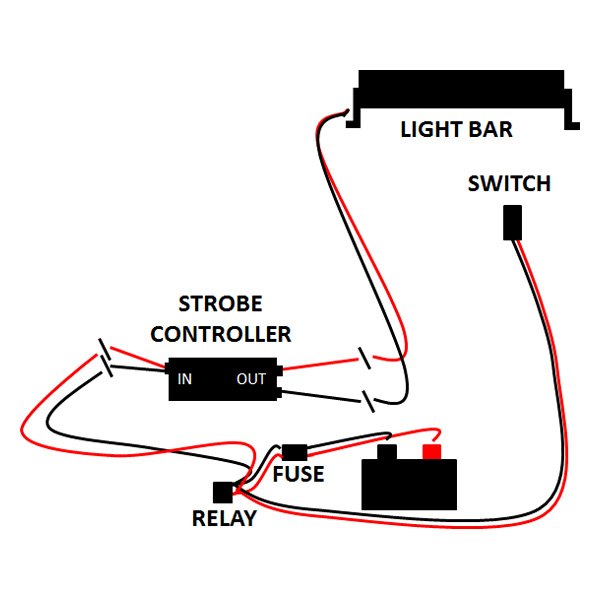
The remote strobe controller is an inline strobe unit, which means you simply put the box in line with the lights you want to strobe. The trick is it must be after the switch, after the relay, after the fuse, and just before the light(s). Here is a quick diagram that should clear up any questions.
- HIDs vs. LEDs for headlight and fog light replacement bulbs
-
Install time:
•HIDs - 30-60 minutes per set. Requires harness and in most cases a resister pack. (Professional installation recommended)
•LEDs - 5-10 minutes per set. No bulky harness. Only in some cases requires a resister pack on ''mopar'' vehicles.
Warranty:
HIDs - 2 years on bulbs.
•LEDs - Limited lifetime on a full kit.
Brightness:
•HIDs - Approximately 1000 Lumens.
•LEDs - 1800-2200 Lumens and 15-20% wider and longer views than HIDs.
Legality:
•HIDs - Not 50 state on-road legal.
•LEDs - 50 state road use legal.
Kelvin (color):
•HIDs - Shades include 3k-yellow tint 4300-white, 6k- light blue tint, 8k blue tint. As the k (kelvins) go higher, the dimmer the bulb gets. Also the color is what makes it easy for law officials to spot HID equipped vehicles.
•LEDs - 6k equivalent. Crisp white and matches LED light bars, cubes, etc.
Life span:
•HIDs - 2,500-4,000 hours.
•LEDs - 20,000-25,000 hours.
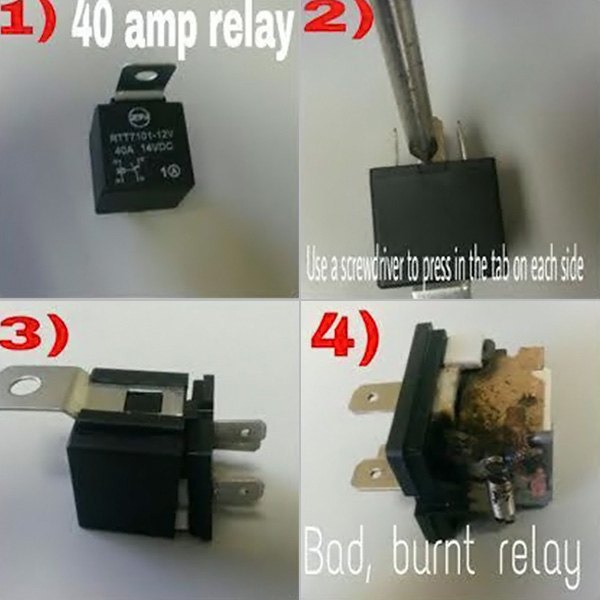
- Why are some of my LEDs on my light bar flickering?
-
The problem/solution to this issue is the relay. You would need a 40 amp relay.
- How do I stop wind noise from my 50 Off Road LED Light Bar?
-
Because all light bars have fins for cooling, all makes and brands have a chance to whistle at highway speed, but OLB has great news! You can almost completely eliminate this howling or screeching noise. Better news, it will take less than 15 minutes. The entire noise is coming from the wind whipping past the cooling blades on the back of your new LED light bar. Though you need air to move around and past your light bar for cooling, you don’t need so much you can’t hear your stereo!
Start with purchasing a door seal kit. You are not looking for the foam surrounds, but rather the rubber flap (about 1 to 1.5'' wide) that goes on the bottom of the door.
Be sure to get the version with the tape vs the nail on! You will obviously need 2 as they are 36'' long and your light is about 50''. OLB installs them by putting them between the first and second blades on the top of the light bar, nearest the windshield. Simply install the first 36'' strip to the light bar, then measure and cut the second strip. Be sure that you match the uncut edge to the other strip to create a clean look at the joint, the cut end will hide better up against the end of the light bar.
These strip will greatly reduce, if not completely eliminate the noise!
- How bright are LEDs and HIDs, what are some patterns?
-
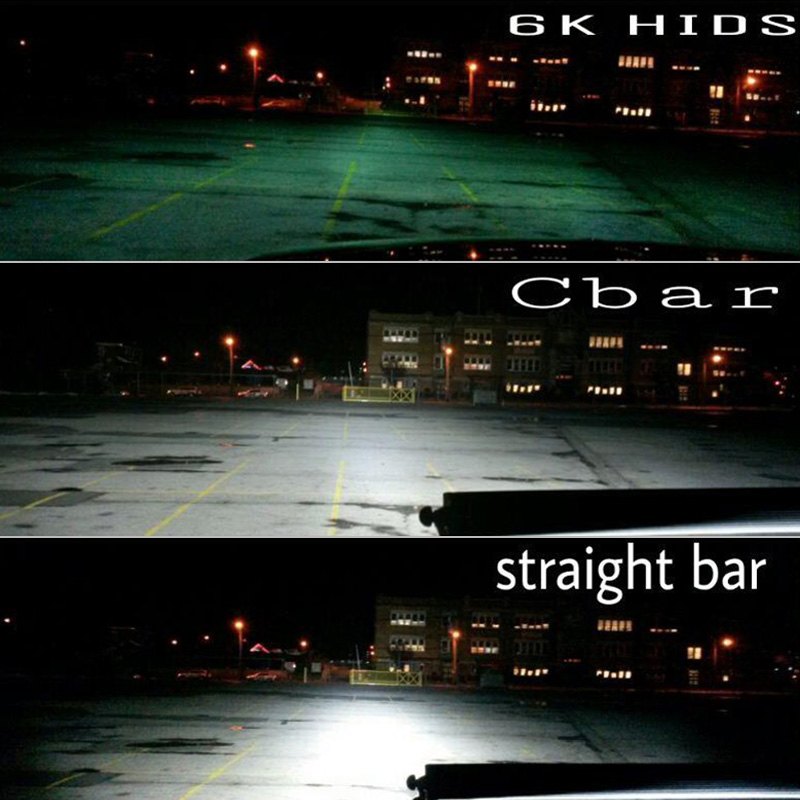
Here are the pics of different temperature lights and styles of light bars and beam angles.
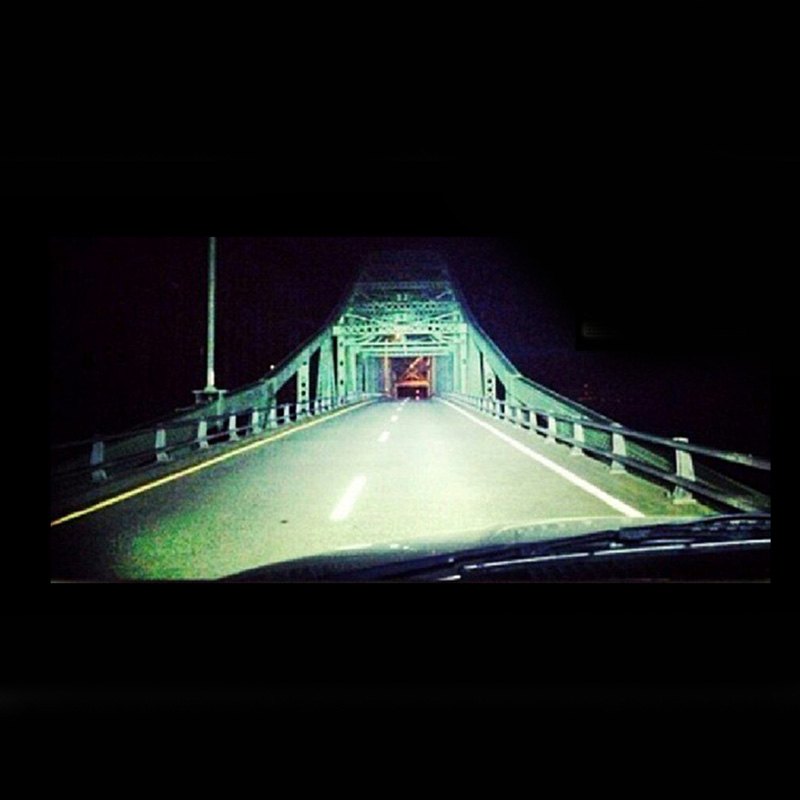
Here you see the 6k temp HID headlight bulbs and ballasts in action, then the curved 50'' CBar, and the OLB 50'' straight LED light bar.
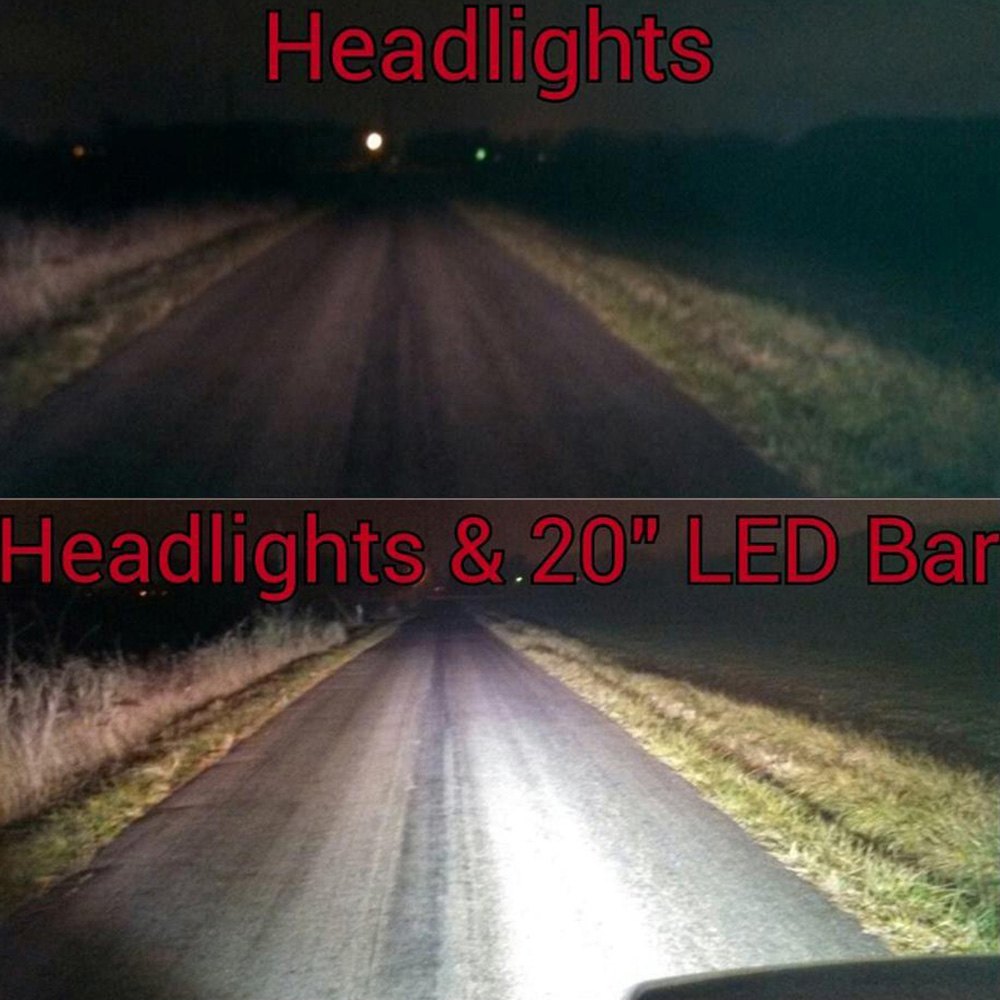
Stock headlights on a newer Ford F150, then flipping on the OLB 20''.
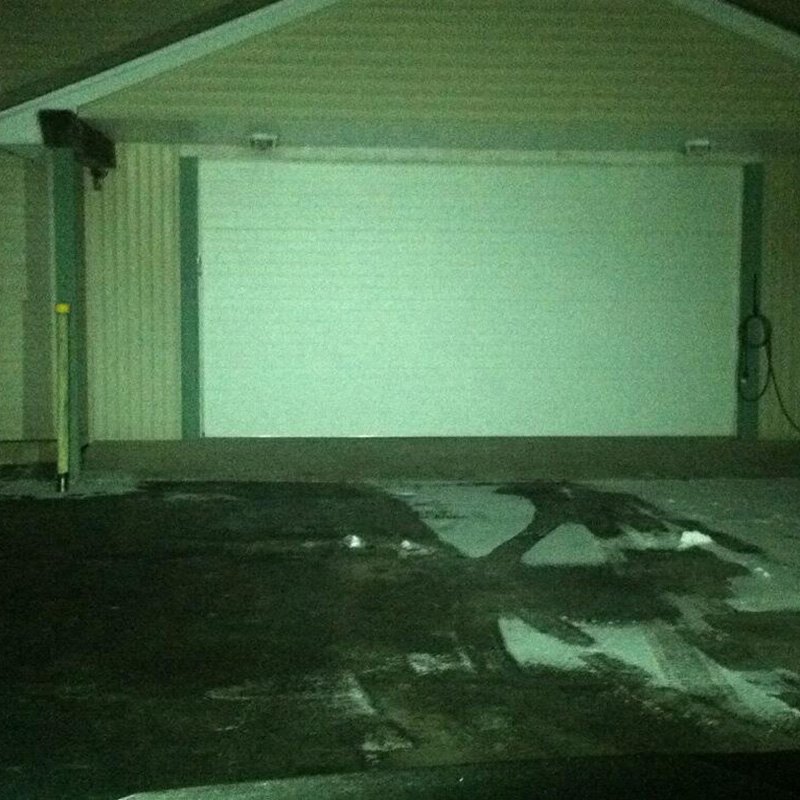
LED light bar. OLB Gen2 Cube lights in a Flood beam:
Our Gen2 Cube lights in a FLOOD beam:
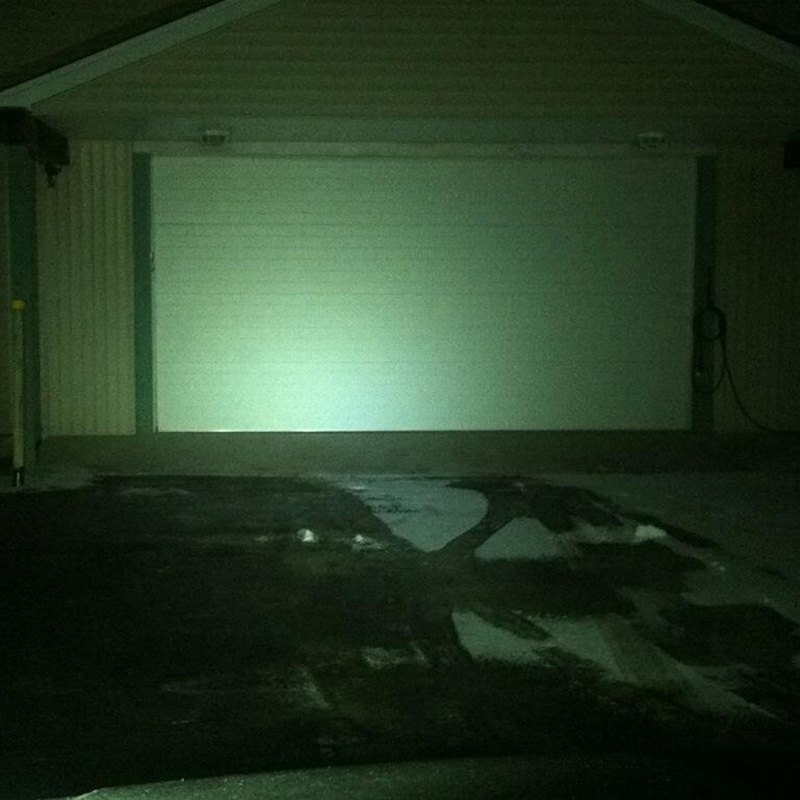
Same Gen2 Cube lights in a Spot beam:
- Why isn’t my HID light bulb firing?
-
One of the most common issues is flipping the plug on the ballast or accidentally connecting the wrong wires. HIDs only work if the positive and negative are exactly correct. Sometimes the best thing to try is flipping the plug on the ballast.
- What are the actual length dimensions of LED light bars?
-
The actual length is 1.5" more for the whole light, beyond the advertised length. With the standard mounting feet attached the overall length is 2.5" more than advertised length.
For example, the 40" light bar is actually 41.5" in length without the mounting feet and 42.5" in length with the mounting feet.
The width of the 6", 12", 20", 30", 40" and 50" light bars is 2 3/8" wide for the outside dimensions.
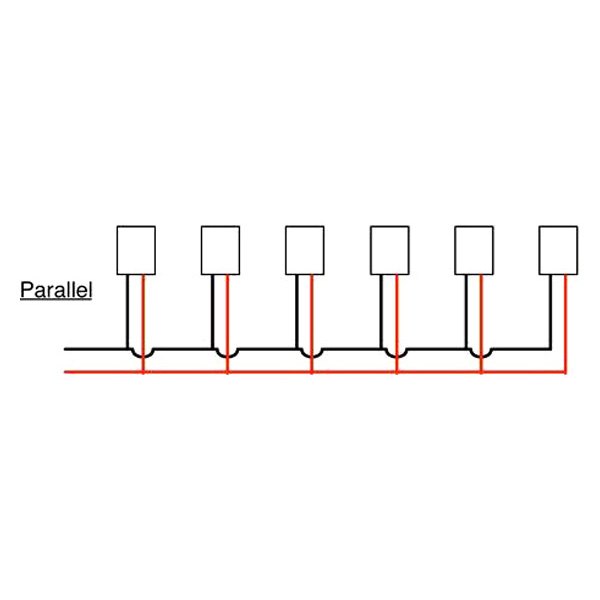
- Can I wire multiple LED lights together with single harness?
-
Yes, lights need to be wired in parallel. Which means positives together and negatives together. Each harness is able to handle 300 Watts, simply add the wattage of each bar and do not exceed this limit.