
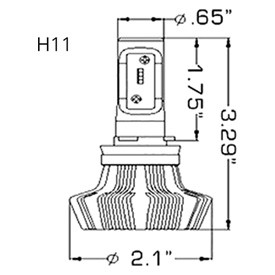
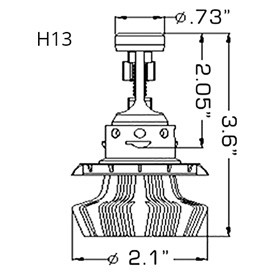
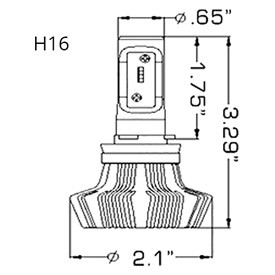
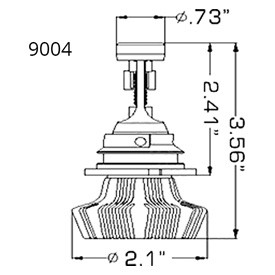
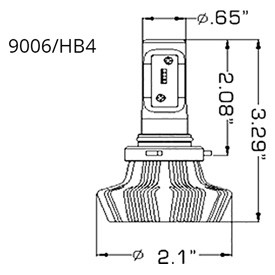
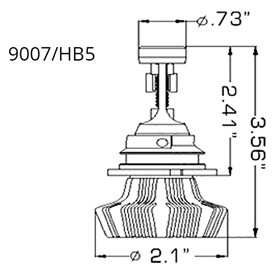
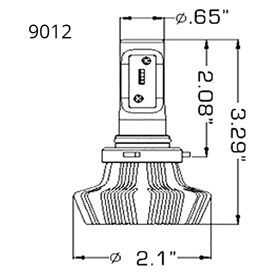
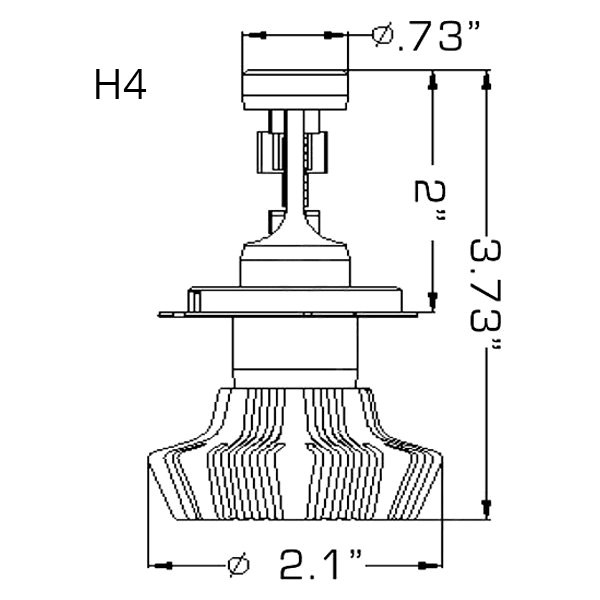
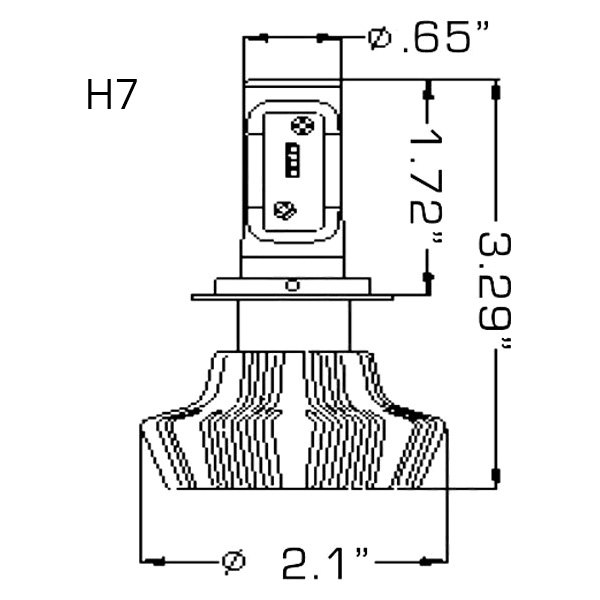
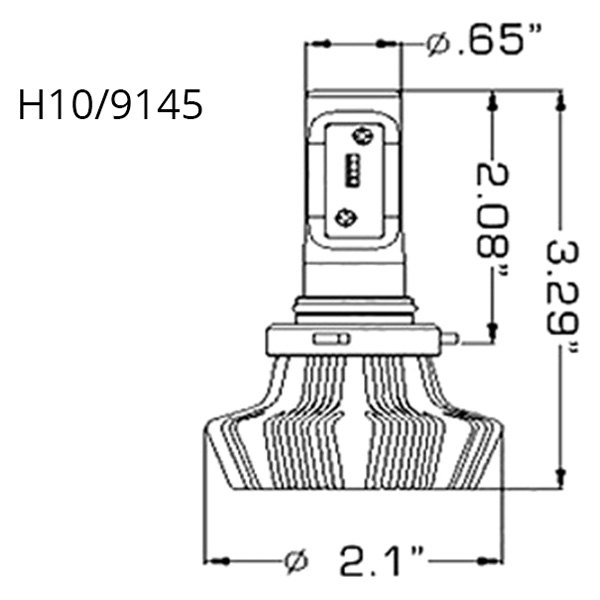
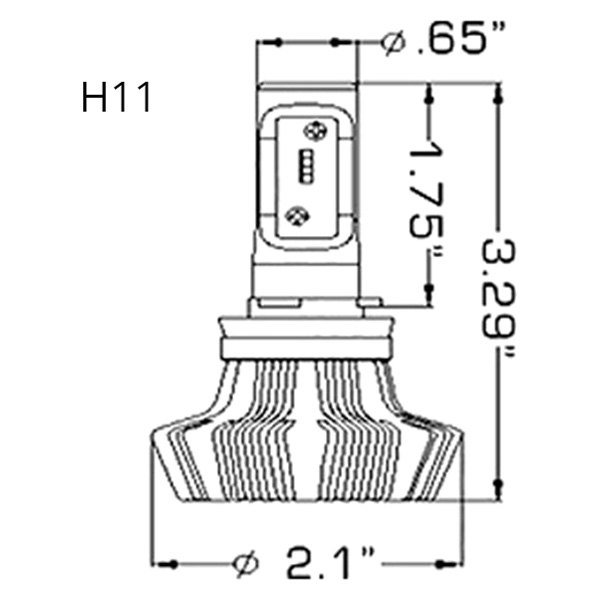
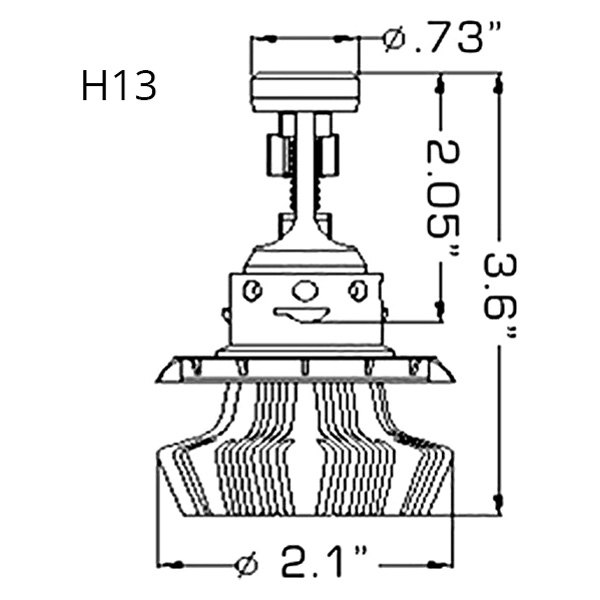
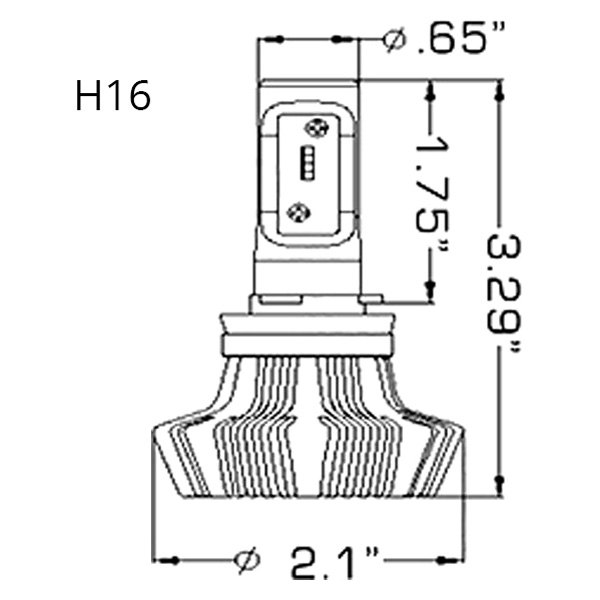
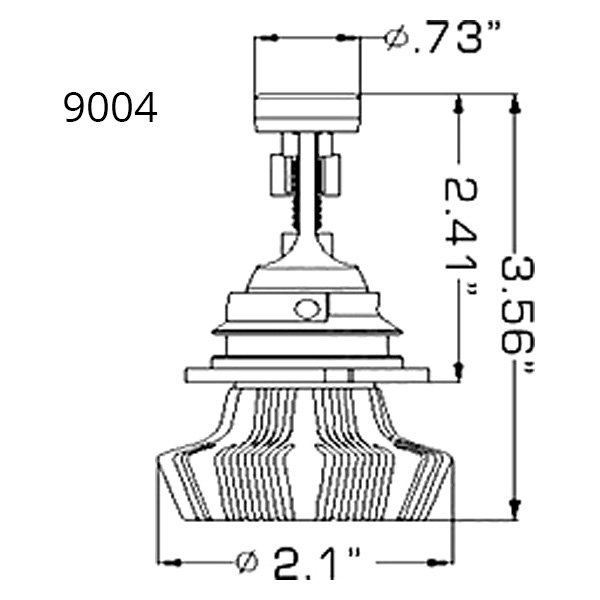
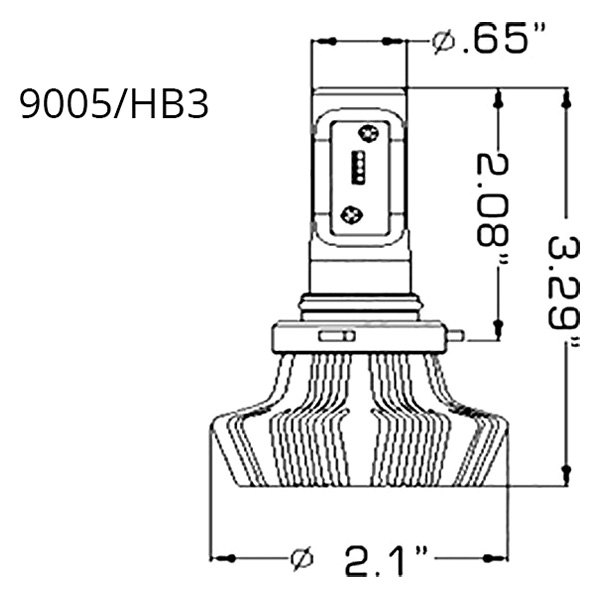
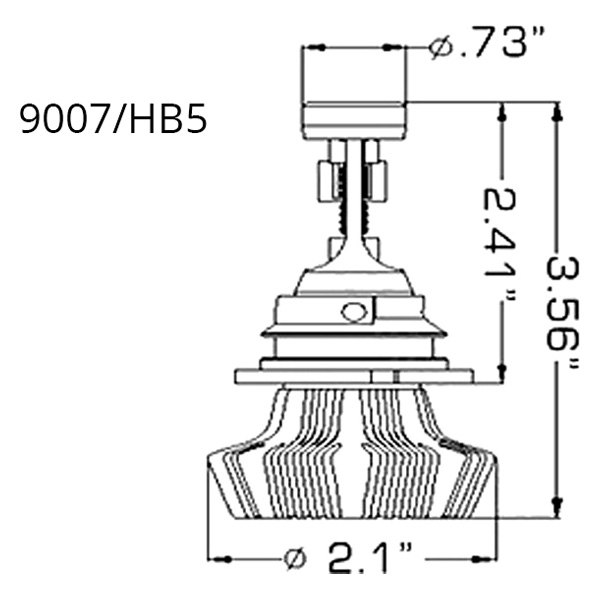
- Bulb Size
- FAQs
- Installation
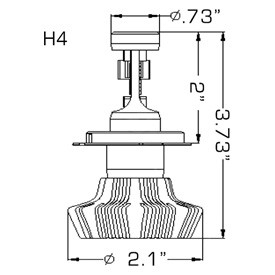
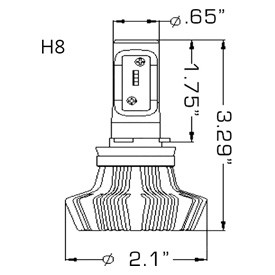
Please check bulb dimensions and confirm this will fit your vehicle with adequate fan clearance before ordering.
- Are these bulbs bright?
-
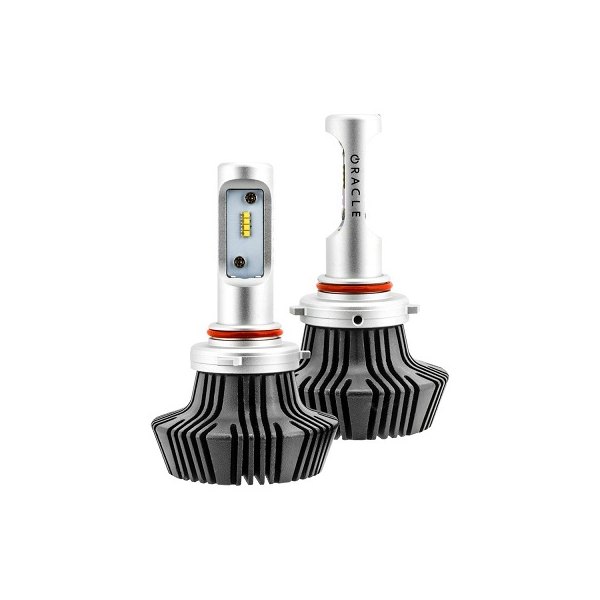
- In other words, yes. These bulbs are very bright, rivaling the brightness of the top of the line HID kits on the market today. The new Philips Luxeon ZES chips offer 150% more brightness & 4,000 Lumen output.
- Will these bulbs fit into my headlight?
-
- Since this bulb has a unique cooling structure and its back can be bigger than your factory one's, make sure that in the back of your light there is enough space for this bulb. Please check bulb dimensions and confirm this will fit your vehicle with adequate fan clearance before ordering.
- Do these bulbs require ballasts like other HID kits?
-

- No. These bulbs do not use ballasts, but instead use compact LED drivers.
- Do I have to purchase a harness for these bulbs to plug into?
-
- No. These LED bulbs will plug directly into your factory headlight harness.
- What is the coverage years of Oracle LED Headlight Conversion Bulbs?
-
- 2-Year Warranty
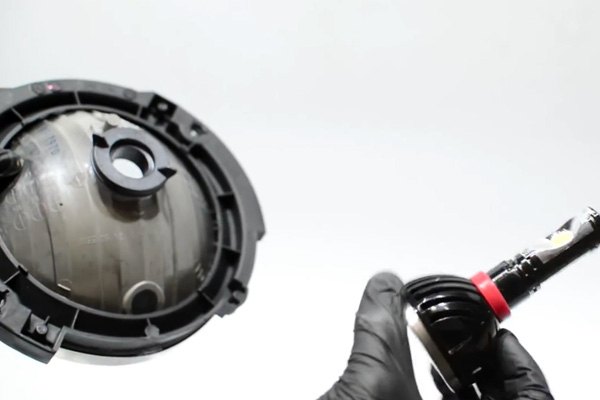
Here is a quick video with a couple of tips showing you how to install one of the New ORACLE LED Headlight Bulbs into a headlight.
Removeable, reversible heat sink
Step 1: To remove the heatsink, first unscrew fixing bolts with a wrench.
Step 2: Unscrew and remove the aluminum heat sink from the bulb.
Step 3: You may find on some installations that securing the bulb retaining clip is easier with the heat sink removed. In these cases, install the clip, then reinstall the heat sink. If a lamp dust cap doesn't close after bulb installation, reverse the installation of the heat sink. This will reduce the overall length and make it possible to install the dust cap of lesser diameter.


